[Introduction]
[The source]
[421 - The Start]
[424 - Showing your Routes]
[423 - Path Manager]
[A New button to save routes]
[Download]
[Installation]
[To do]
Introduction
End of 2012 I got this crazy idea to run in the 2013 Antwerp 10 Miles. Always wanted to do something like this, but never took the step.
That year however there were some co-workers who would also participate.
I started increasing my training a bit and I moved from the treadmill to the outdoors. How to keep track of my training? A GPS device was the obvious answer for me. Because I did not like the idea of running with my phone I looked at several GPS watches. To be honest, I thought they were all too expensive for an amateur like myself.
At a certain moment in early 2013 I saw an advertisement from the Aldi supermarket. A GPS watch for approx. €70,-. That's the one for me I thought.
Now, so many year later I still use this watch in combination with the GPS Master program.
There have been some issues, but when you discover this watch was sold under many different brand names you can find a lot of information.
One of the first problems I had was a message from Google that my browser version was no longer supported. This caused some scripts to crash. Using google I came a cross a site that offered a solution using a resource hacker to edit the HTML files inclosed in the EXE. The last time I did something like this was a long time ago to give winAmp a custom skin before it was a feature. :-)
Some time later I found this site which offers a newer version (v2.0.21.1012) of the GPS Master program. That update also solved the problems. This site offers a solution to the error messages by editing/adding a registry key. Solution is at the bottom of the page.
While reading all the forums (NL/DE/UK/AU..) one thing that did become clear was that there was no product owner to turn to in case of a problem. Some people wrote they received updated software by mail from a certain Krippl employee, but I tried that and did not get any response. I even contacted a guy who's name I found in the source code of the program. He confirmed he had worked on it, but had not been involved for many years.
From the beginning of 2017 to mid 2018 the program worked fine. I even got a newer version (v2.0.23.1130) through the update feature. So what changed in 2018? Well Google did. More precisely, they changed how and what to pay for the use of Maps in your program.
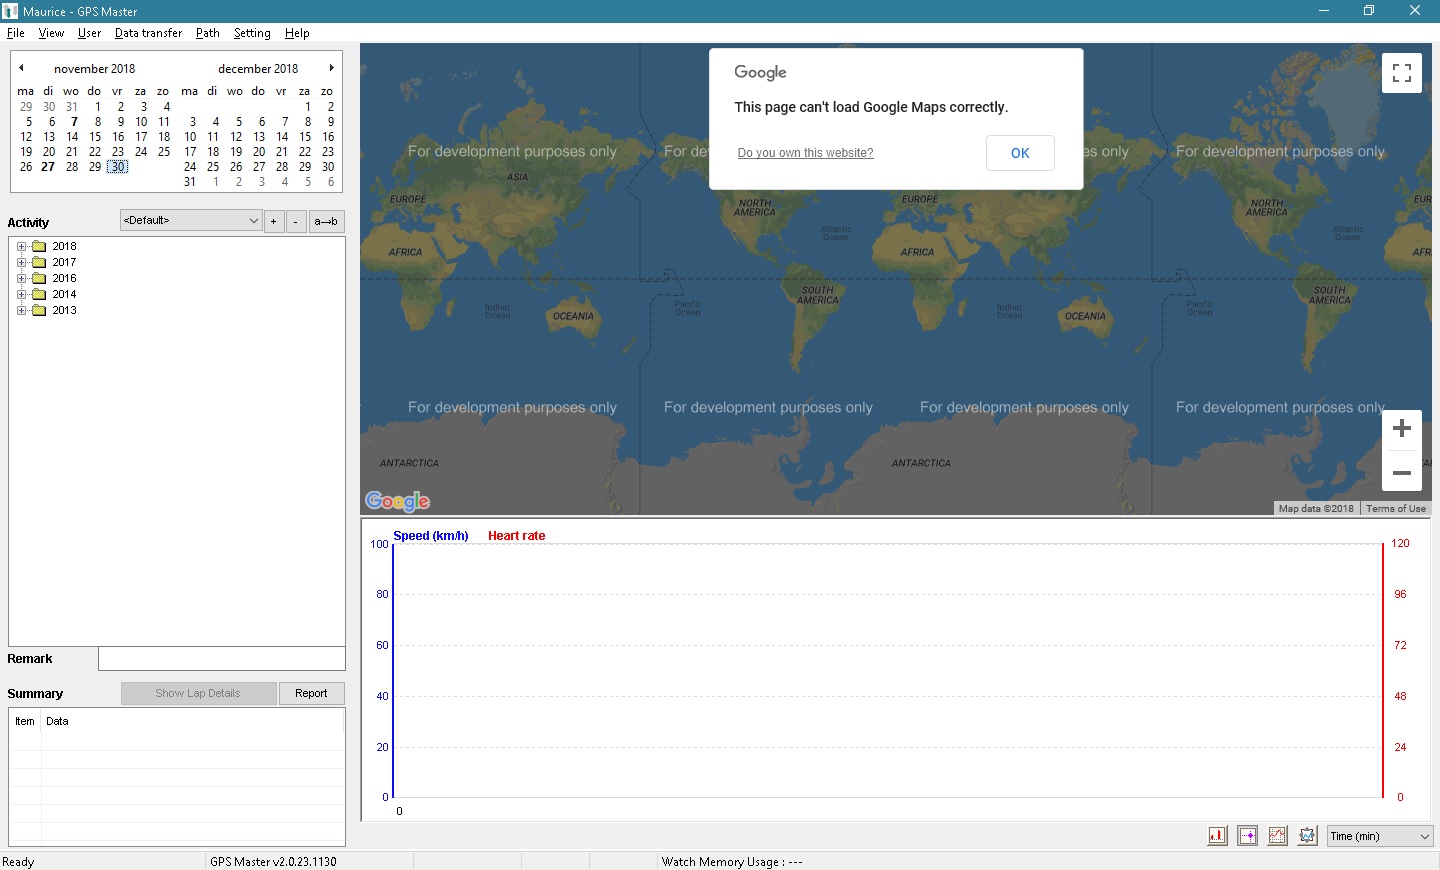
The program still works, but every time you change your selection you get an error message and the map is dark with a watermark, "For develop purposes only". Because I could not find a way to solve this problem, other then applying for an API key, I though well maybe I can replace Google Maps with OpenStreetMap. This turned out to be easier said than done. At least for me, not being a programmer.
The source
As I wrote earlier the first time GPS master needed fixing we used a resource hacker to change the reference to the Google Maps version that was in the internal HTML files. All I had to do was to replace the Google code with OpenStreetMap (OSM) code.
OSM/Leaflet
OSM code? First thing you read is there is no OSM code, ther are several. After a short period of browsing the wiki and some googling I came to the conclusion OpenLayers and Leaflet were the libraries I was looking for. The text "It is much less complicated than OpenLayers and instead focuses on performance, usability, simple API, small size and mobile support." made me choose for Leaflet.
First try - identify the maps
So now we have a plan and the tools we can really start.
When you open RH you see several folders. We are interested in the HTML folder.
Before I could start with my modifications I needed to know what to modify. I remembered from the earlier change that there are several HTML files included that look like they have a similar purpose. Are they all used or not? Last time I just changed all references I could find. This time I wanted to focus on the useful modifications.
We have the following files:
- 270 - Based on the title and the javascript functions this looks like a map used in the Path Manager section.
- 276 - Looks very similar to 270.
- 295 - KML file. Maybe used for the export function?.
- 421 - There is Javascript to create a map, but nothing more. Our Start map maybe?
- 422 - This is clearly a map with a route, where does it come from? I see no interaction with the user, the only source of input is a cookie.
- 423 - Looks very similar to 270 and 276.
- 424 - Looks very similar to 422.
- 460 - Looks like an empty HTML template.
- 461 - This is the code for the CSS file (mapstyle.css) that is created at runtime.
In order to see which maps were used I simply made a copy of the GPS Master program and changed the html in 270/276/421/422/423/424 to enable scrolling. And added the file name as text in the body. The program started with map 421. Selecting an exercise showed map 424 and opening the Path Manager gave me 423. Now I knew which maps to modify.
421 - The Start
Having no experience with Leaflet I took a shortcut and just copied the example from the Leaflet Quick Start guide into file 421. Compile, Save and start the progam...Presto it worked! Of course I was still far away from my goal but the first map was there. Looking at the source from within the program I noticed that at the top of the source the following line was present: <script type="text/javascript" src="http://maps.google.com/maps/api/js?sensor=false&language=en">
I checked the source in RH, but the line was not there.
Had a look at the source of original 421. There was a reference to maps.google.com, but is was not the same as the one that showed up in the program. Where did it come from?
Scrolling through the source I had seen description tags that did not look like descriptions, more like place holders: <!-- tag,script_lang --> <!-- tag,min max LatLng4 -->
After some experimenting with <!-- tag,script_lang --> My conclusions were:
- GPS Master writes the maps.google.com reference on the row after the tag. Writing over what is there.
- If the tag is removed, the reference is placed on the first line. Also writing over what is there.
Where does this text come from? Looks like I needed an other tool: A HEX editor.
I opened GPS Master in XVI32 and searched for 'maps.google.com'. What I found were the HTML files I could edit with RH. That was not what I was looking for. Scrolling through the hex data I found text spaced with '00'. Lets give that a try: maps.google translates to 6D 00 61 00 70 00 73 00 2E 00 67 00 6F 00 6F 00 67 00 6C 00 65 00.
I found five ocurrences of this text. The first three looked like what I was looking for, the last two were 'maps.google.com.hk'.
To see which line was pushed to which file I changed the version numbers in the string from 3.24 to 3.91, 3.92 and 3.93.
- 3.91 - The start map.
- 3.92 - The map with your excersize.
- 3.93 - The map use for the Path Manager
To see what would happen I made a copy of the original program and replaced the complete string with zeros.
After starting the program I got a lot of Javascript errors relating to google. The reference to the source was gone. Instead there was a blank line. I applied this fix to my first Leaflet map and the reference to maps.google.com was gone. There were several options:
- Keep the tag and just make sure the line below it did not contain anything that was necessary.
- Remove the tag from the file and start the HTML code at line two.
- Replace the text with something useful and use it. At the first line or anywhere else.
I opted for number two. Now I had a OSM/Leaflet map without any reference to Google.
Because I just copy/pasted the source from the example into GPS Master it still had all the features(circle, polygon, marker and popup) and it did not fill the complete frame. Removing the circle, polygon, marker and popup was easy, but how to get the map to fit the frame?
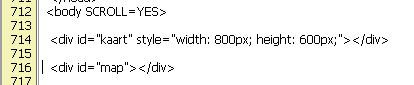
The Leaflet map is defined as <div id="mapid" style="width: 600px; height: 400px;"<>/div> the original GPS Master map is only defined with <div id="map"<>/div>. Where are the dimensions set? The answer to that question turned out to by quite simple: The CSS (<link type="text/css" href="style.css" rel="stylesheet" media="all" />)
All I had to do was to change var mymap = L.map('mapid').setView([51.505, -0.09], 13); into var mymap = L.map('map').setView([51.505, -0.09], 13); and to change the definition in the body to <div id="map"<>/div>. First map was ready!
424 - Showing your Routes
Now that I had managed to show an empty map ;-) it was time to start with the routes. The frist thing I tried was to copy my map from 421 and build on that. Unfortunately this did not work. The program kept crashing. My conclusion was that the crashes where caused by the missing placeholders I wrote about earlier. So what to do?
Lets add a second map to 424!
My new idea was to add the new OSM version of the map to 424 and modify/add the functions I needed to make that map work. Afterwards I could just delete everything related to Google. Where to start? Of course I had to add the references to Leaflet in the header, but the program tells you where to look after that:
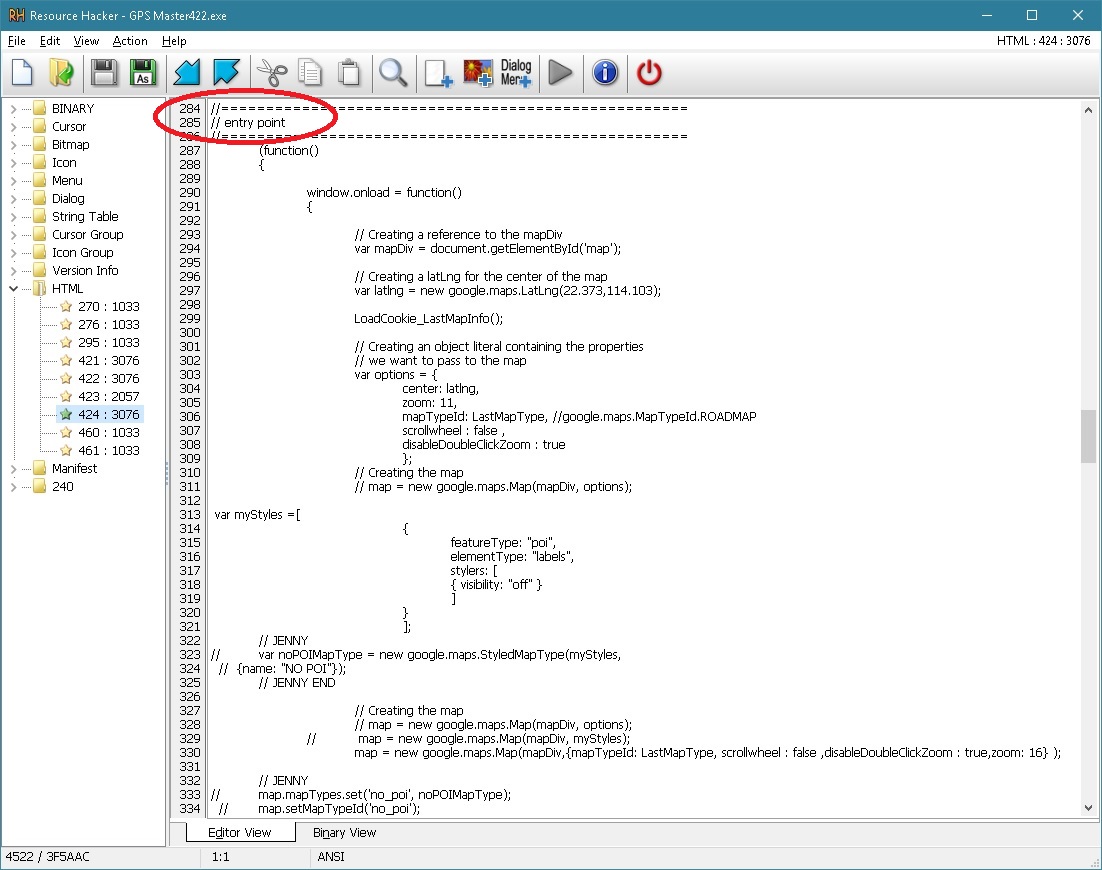
From row 287 to 385 were all the variables and functions related to the creation of a new map.
I started by adding references to the OSM map to the HTML file. (BTW kaart is dutch for map.)


The result:
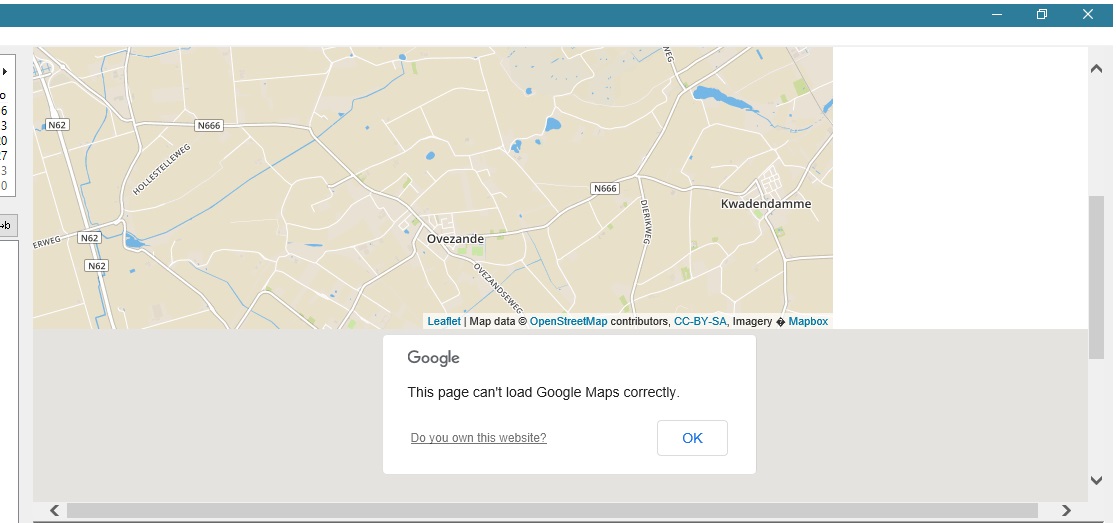
Going through the whole start sequence I came a cross a call to a function 'ShowMarker_and_route()'. This looked like the function(s) that make your route.
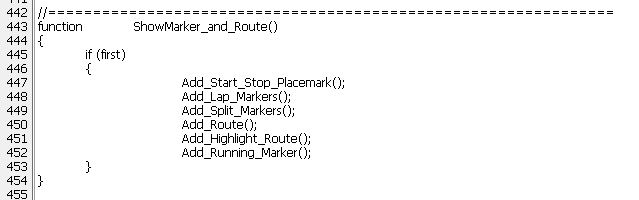
You can see that a route is drawn in different stages:
- Start and End point are set.
- Lap markers are set.
- Split markers are set.
- The route is drawn.
- Selected parts of the route are highlighted.
- The running figures is shown.
One to four is where the route is actually drawn, five and six have to do with the graph that shows speed, heartrate etc. More on that later.
Looking at the first function there was another placemarker, <!-- tag,StartStopPlacemark-->.
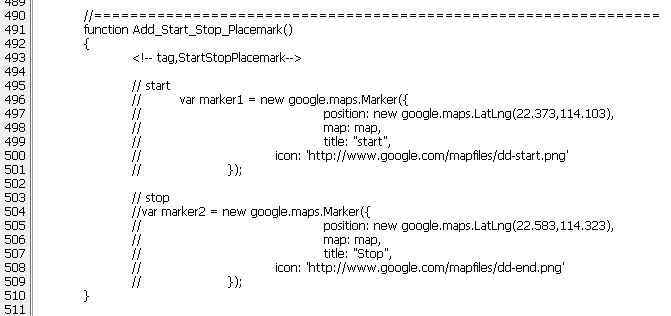
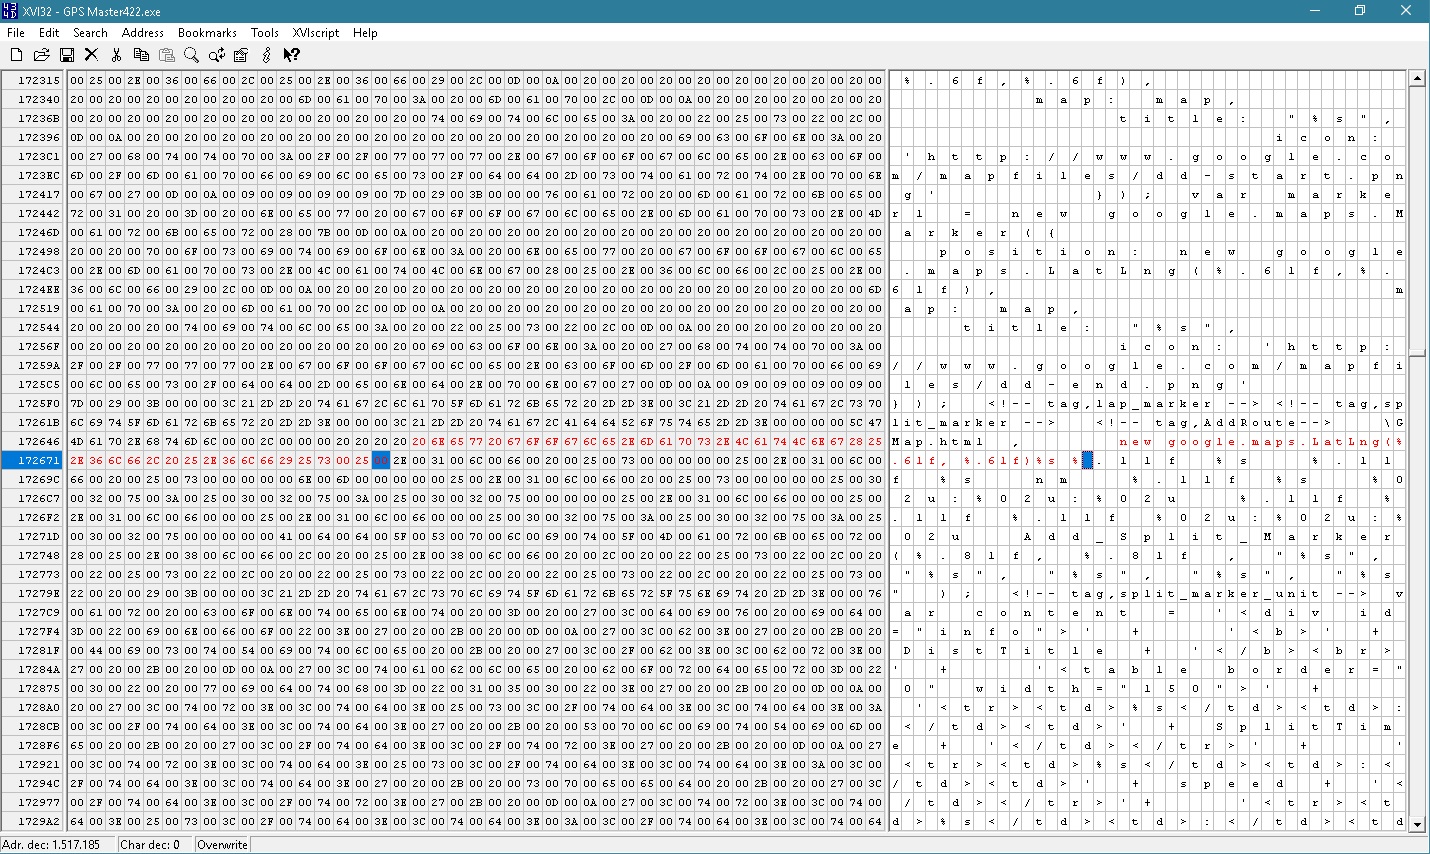
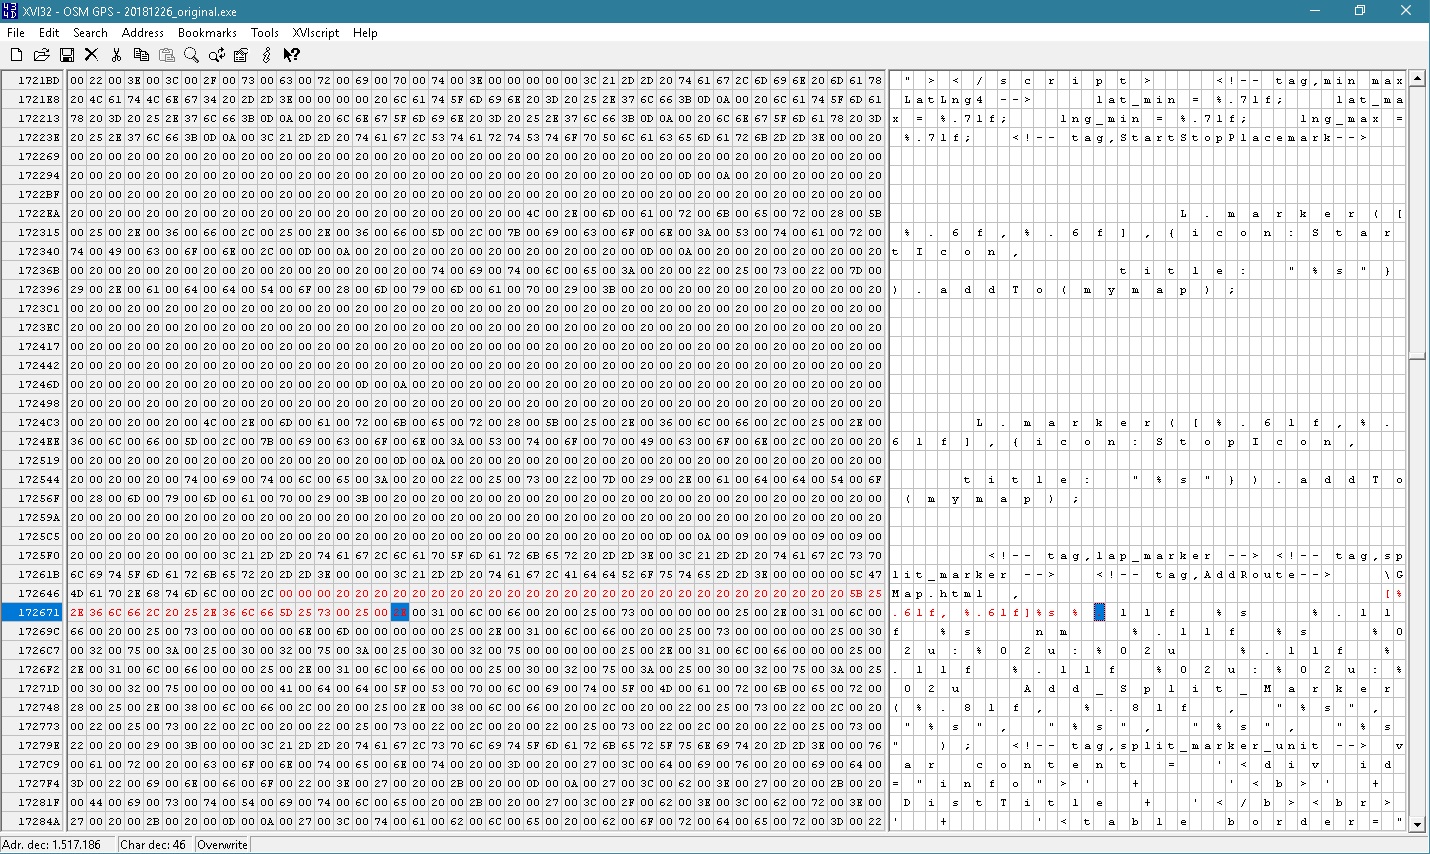
A look at the source of a route showed me that the placemarker was replaced with text similar to the text that was below it. So I started the hex editor again and looked for the function:

As you can see there are variables passed to the text before it is written to GMap.html. this meant I needed to build the Leaflet function around those variables. Using a lot of extra spaces (hex 20) I removed the old functions and replaced them with the new.
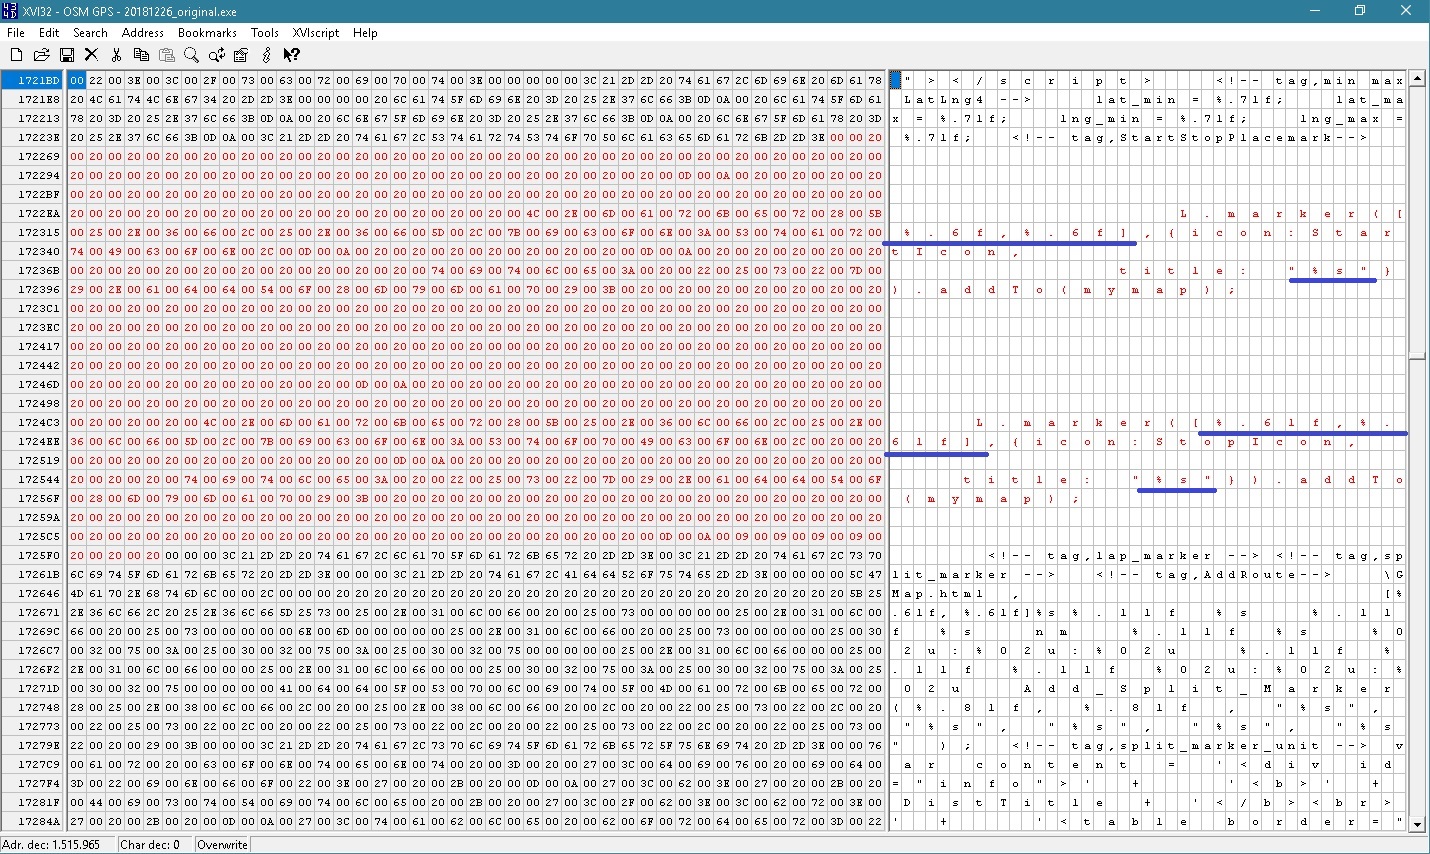
The result was two markers on my OSM map!
All those extra spaces look a bit strange in the source, but it works:

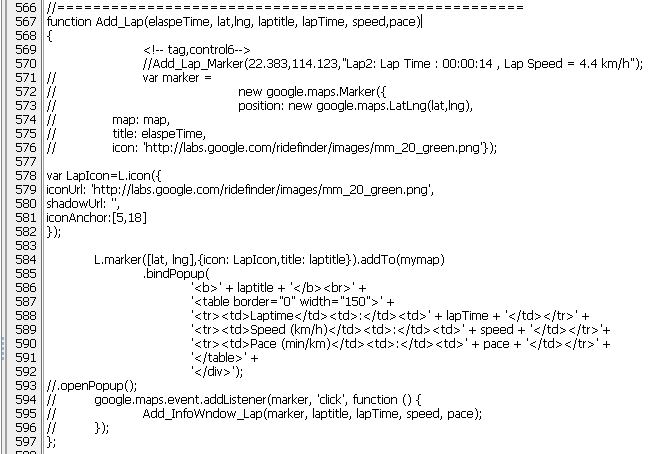
Next was the Add_Lap_Markers() function. Another placemarker, but this time the lines that would be inserted where references to another function, the Add_Lap() function. If you are now guessing placemarker you are right, but fortunately for me it turned out to be one that is not used. The source of Gmap.html, an actual route that is showing in GPS Master, shows the placemarker (<!-- tag,control6-->) in place. The referenced function Add_Lap_Marker is also never used. Next image shows my new code, with the old google references still in place, but commented out. You also see I am no longer using the separate function for the popup.
I ignored the next function, Add_Split_Markers(). I do not have any excersize where this is used. It looks similar to the Add_Lap_Markers() function so it will be easy to change if needed in the future.
Step 4 is the drawning of the actual route. The route is added to the map as a polyline. As you can see in the function below the points come from a variable named 'route'. The Google function passes some additional properties to the polyline, but for me the default line was enough.
Google:
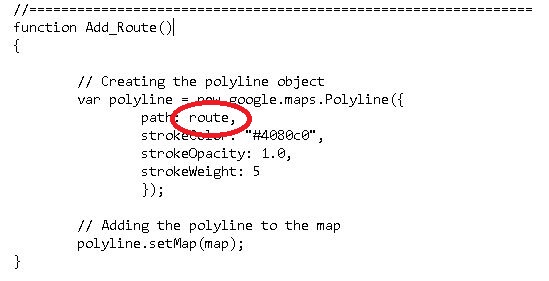
OSM/Leaflet:

That looks like an easy one, but the problem here is not the function. It is the variable.
Google:
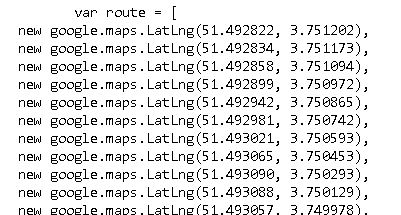
OSM/Leaflet:
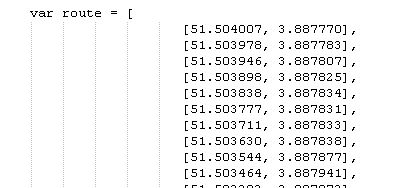
You see that where Google Map requires 'new google.maps.LatLng()' Leaflet only requires the co-ordinates in brackets. As I did with the Start and Stop marker I edited the file with the Hex editor:
Google:
OSM/Leaflet:
There it was, a working map with a route and all the markers.
But what about steps five and six, the highlighted route and the runner? If you look at the first image on this site you see a graph below the map. As mentioned before this graph shows things like speed, heartrate etc. One of the features of this graph is that when you move your mouse over it a runner will show you where you were on the map. An other feature is the possibility to zoom in on an area of the graph. When you do this the corresponding part of the map will be highlighted.
The Leaflet function is very similar to the Google function so this was a five minute job.
The only problem was to trap a length of 0 but that was solved with a simple IF statement.
Last but not least, the runner.
When you move your mouse over the graph you will see a runner going over the route. The location corresponding with the place on the graph your mouse pointer is.
There are actually two runners, one going east and one going west, but for some reason only one is shown per route. The function for the other runner never gets triggered. I wrote an extra function that is called from either the east or west function that will show you a runner going in the right direction.
423 - Path Manager
Last but not least there was the Path Manager.
I was worried this was going to be a difficult one, but it turned out that this was not the case. I could use a lot of things I learned when working on map 424.
A New button to save routes
On my two computers I cannot save any new routes. The pop-up shows no waypoints. I am not 100% sure, but both PC's are running Windows 10 and I've read that the (im)famous FCU 1709 changed the way Windows uses cookies.
As a way around this problem I wrote a little Javascript function/procedure that allows you to save your new path. You will have to close and re-open the Path Manager to get your new path in the list.
SMALL DISCLAIMER: For anybody having a look at the source. I know it looks REALLY bad, but it works. Will probably clean it up in the future, but for now I'm happy that it works. :-)
Download
2023-03-30
Updated the MapBox acces token. Map wasn't loading
2021-01-13
Finally added the possibility to switch maps. You can now choose between Default OSM, Mapbox and ESRI Imagery.
Cleaned up some debug code.
2020-02-04
Fixed a small bug in the highlighting code that prevented the last part of a route from being highlighted.
Removed more Google related code.
2019-05-29
Changed the way the map is loaded.
Fixed some zoom issues.
Removed a lot of Google related code.
2019-03-25
Added textbox that shows amount of markers used.
Added function to renumber your markers.
Changed the map that is used.
Version is now shown as V2019.3.25.0
2019-01-12
Fixed the wrong reference to the icons in the Path Manager.
2019-01-02
First published version. Everything should work, including my own extra save button in the Path Manager.
Most of the old Google code is still present, just in case.(Password on the zip is 12321.)
Installation
Installation is very simple. Just copy the EXE into the existing GPS Master folder.
To do
- Clean up this page.
- Clean up the code in program.
- Fix the icons used on the maps.
- A lot more......